Editor Overview
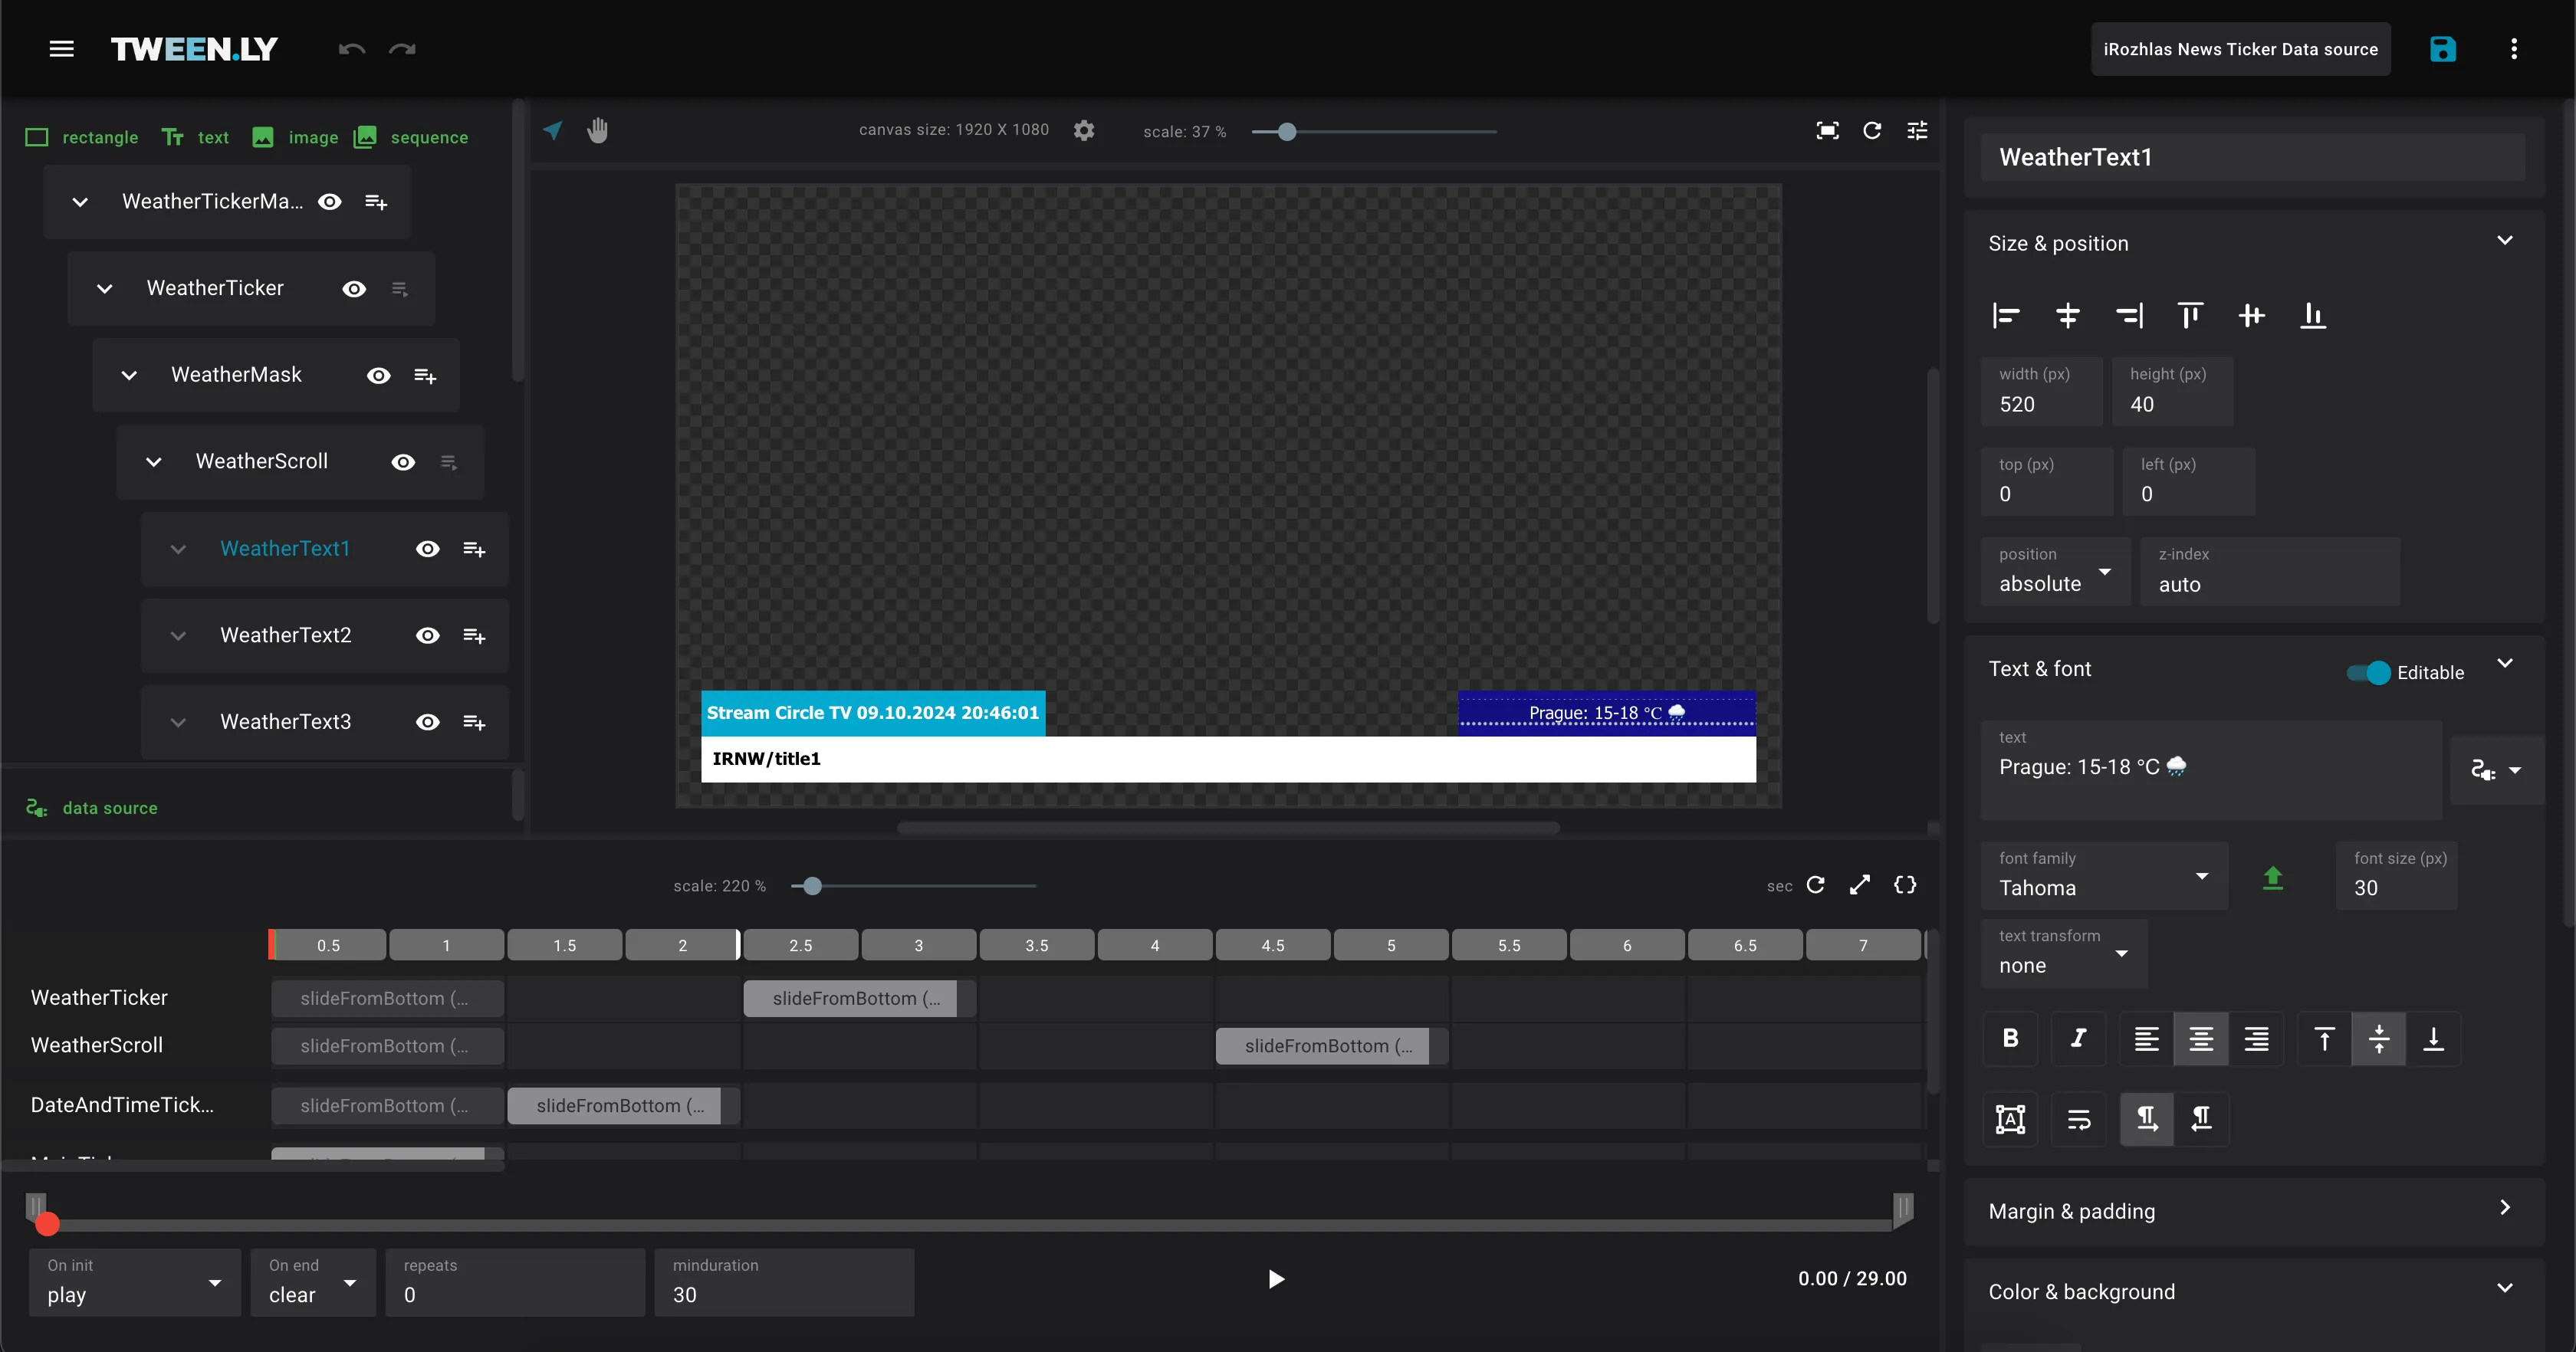
The Editor is composed of several sections:
- In the top bar, in addition to the main menu, there are actions for a graphic file.
- In the left sidebar, there are buttons for adding basic objects - rectangle, text, image. Objects can be nested in hierarchical structures. The object tree is used to visualize this structure.
- In the middle is a scene with a canvas that can be managed with the tools above. The canvas shows the visual form of all objects in the scene.
- The right sidebar contains tools for setting the properties of individual objects or animations.
- Animations are rendered in the panel at the bottom of the screen. Above the timeline are the tools for setting the timeline, and below the timeline is a drag-and-drop playhead, playback actions, and parameters for setting timeline properties.
Graphics File
The graphic file consists of the graphic scene itself, and metadata describing the file:
- Title - The main name of the graphics file.
- Description - Graphics file description, displayed in the graphics file detail in Editor, Gallery and Store.
- Tags - Tags are especially useful for full-text searching in Gallery and Store. All tags are displayed in the graphics file detail in Editor, Gallery and Store.
- Workspace - The workspace where the graphics file file is stored.
- Final flag - Helps to distinguish whether or not the graphics file is a final one and should not be edited any further.
- Thumbnail - Used for a thumbnail preview of the graphics in the Gallery and in the Store grid.
New
Whenever you open the Editor, it is automatically prepared to start creating new graphics. If the scene is not empty and you want to create a new graphics file, open the More menu in the top navbar and click New.
Save
⚠ WARNING: There is no auto-save function in the Editor. Any changes made to the graphics must always be saved using the Save button. If the user is logged out after a long period of inactivity, any unsaved changes will be lost.
Save for the first time
- To activate the function for saving a new graphic file, the scene must contain at least one object.
- In the top bar, click on the icon button Save.
- Complete the form with the data of the new graphics file.
- Click on Save.
- The graphics file is now saved in the Gallery.
Save continuously
- Quick Save – Simply click the Save icon button, if you do not need to change the metadata of the graphic (e.g. title, description).
- Save with Metadata Change – Click on the graphics filename, if you want to change some of the metadata of the graphics (e.g. title, description). A form dialog with the graphic file data opens. Confirm the changes by clicking on the Save button.
Duplicate
To create a duplicate of the graphics file, open the More menu in the top bar and click on Duplicate. A dialogue will open with a form containing the data of the newly created graphic. Edit the data if necessary. Then click on Duplicate. The scene now contains the newly duplicated graphic file.
Clear
Cleans up the entire scene, leaving the file and its metadata stored in the Gallery as they are.
Delete
Currently, a graphics file cannot be deleted directly from the Editor.
Objects
Objects are of 3 basic types – rectangle, image, and text.
Using the buttons at the top of the left sidebar, first-level objects can be added to the scene. Additional objects, which are intended to be children of other objects, can be added using the context menu that is displayed when you right-click on a particular object.
ⓘ INFO: Rectangles and images can contain children objects, while text objects cannot.
The properties of each object, such as position, width and height, can be adjusted by dragging and dropping on the canvas. Other properties can be set in the Properties panel in the right sidebar.
Objects can be duplicated or deleted by right-clicking in the left sidebar objects tree or directly in the canvas.
Rectangle
The rectangle can be used to create a background, a wrapper, a mask, etc.
Rectangle as a background
The use of a rectangle as a background is the most common. The background can have either a background color or a linear gradient. The definition of a linear gradient is given by the text value in the input field. The correct way to write a linear gradient can be found at MDN. For visually interesting linear gradient creation, we recommend the use of some friendly tool such as CSS Gradient.
Rectangle as a wrapper
A rectangle is a good object to use to create a wrapper, for example, for a dynamic text that should never overflow its background.
- Create a rectangle.
- Use the context menu to create text as a child of the rectangle.
- Set the size of the rectangle and the text to be the same.
- Set the overflow property of the rectangle to hidden.
- Now, if you try to type text that is longer than the bounding box of the text object, the overflow text will be hidden.
Rectangle as a mask
- Create a rectangle.
- Use the context menu to create text, image or another rectangle as a child of the rectangle.
- Place the child in the parent rectangle space only so that the intended part is visible.
- Set the “Overflow” property of the parent rectangle to “hidden”.
- Now only the part of the child object that is located in the parent rectangle is displayed.
Image
Image can have the following format: bmp
, jpeg
, x-png
, png
, or gif
.
Text
Fonts
Texts can currently only have predefined fonts – Arial, Book Antiqua, Courier New, Georgia, Helvetica, Impact, Lucida Console, Palatino Linotype, Tahoma, Times New Roman, and Verdana.
Text sizing
Text can be either a fixed size in pixels set in font size or can adapt to fit the size of the text object area. This can be changed via text sizing property:
- Fixed – The text size won’t adapt to fit the text object area.
- Fitting – The text ensures that it fits into the object area, especially if it is longer than originally defined. This is particularly useful in the case of dynamic or live text, where the text data is changed dynamically and there is no visual control. The text has a minimum font size corresponding to the value set in the font size. If the text is going to overflow its area, the font size will be adjusted to be smaller so that it fits into the area.